CLICK HERE FOR FREE BLOGGER TEMPLATES, LINK BUTTONS AND MORE! »

Friday, July 29, 2011

Fine is never enough...

Once again, I finished something, my pantry in this case, and it wasn't good enough.  I had this: pretty but not what I wanted.

What I wanted was this...


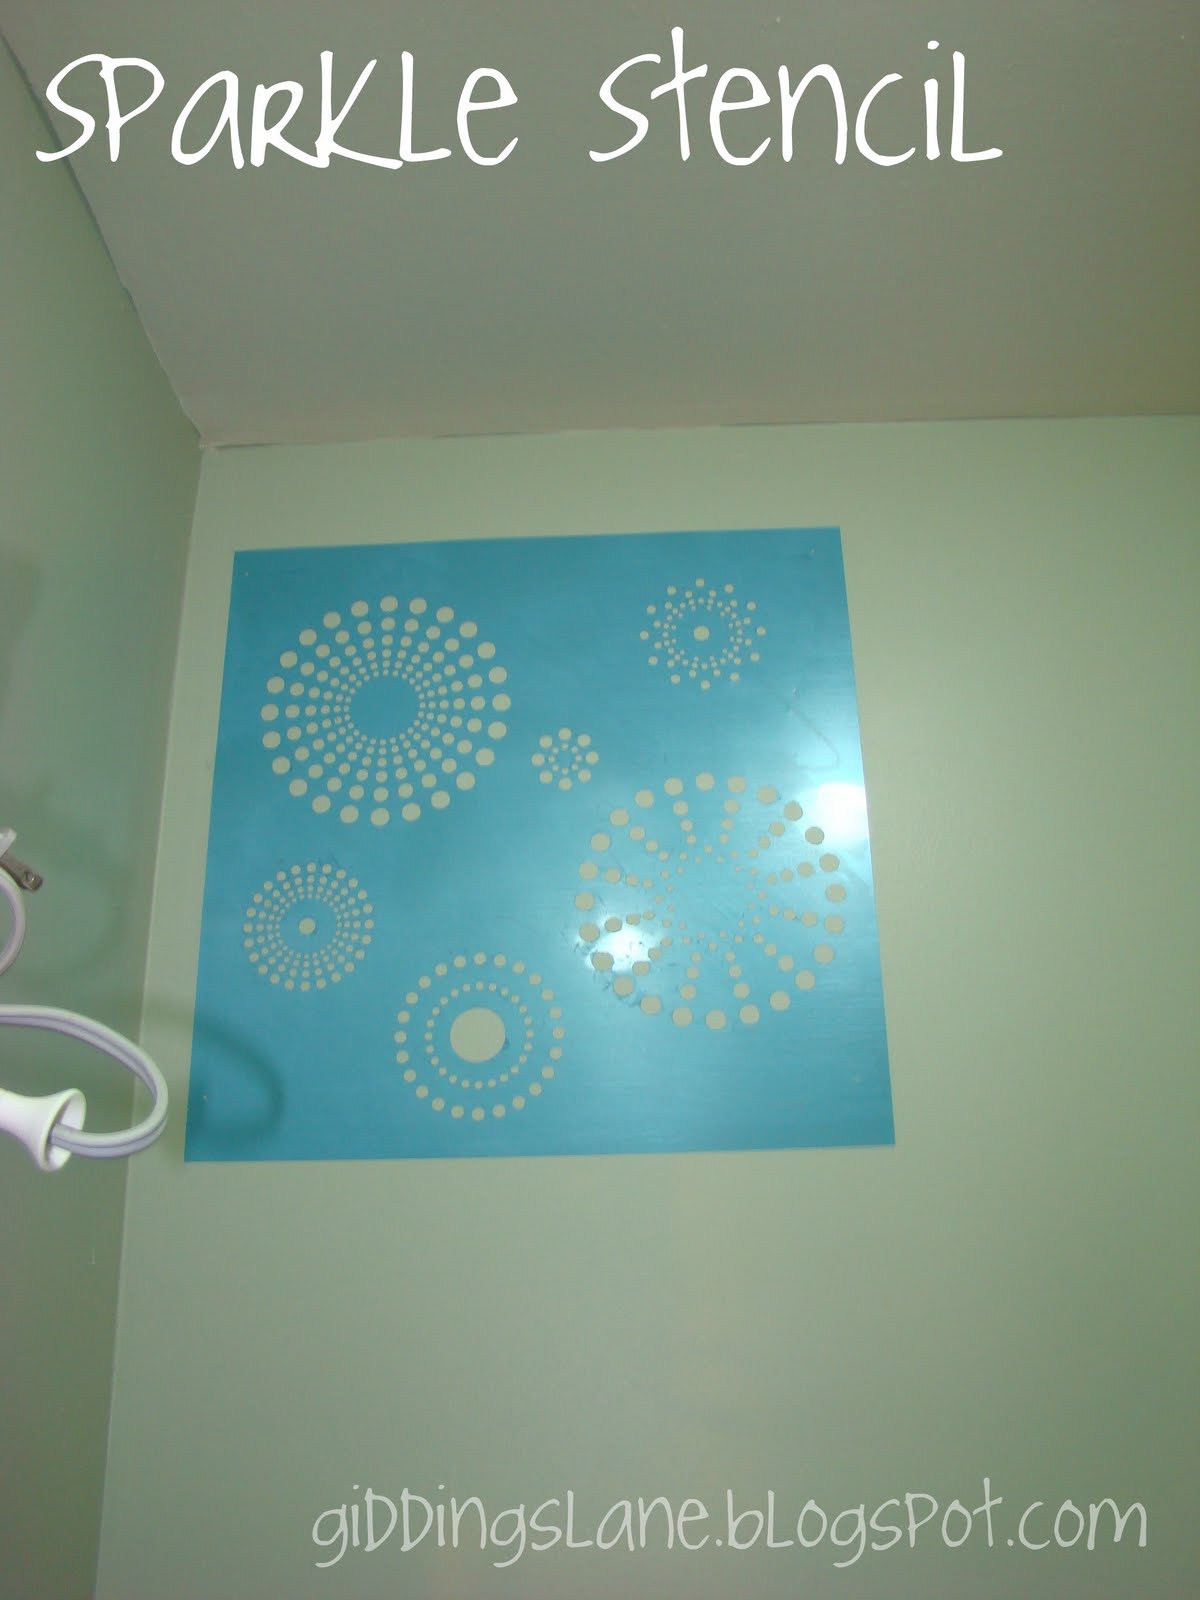
See the pretty pattern in the background?  I love it!  It makes a utilitarian room special.  After cruising the post on how it was done (click the pic to see) I realized what looked painted was instead vinyl.  I didn't have the funds to do vinyl, nor the patience, but man did I want the look!!  So, I cruised the internet for alternatives.  That's where I landed on this.


So pretty!  Just a little feminine with a twist.  Not too fussy.  It was perfect in every way except one, the price.  At $40 it was out of my range.  So, I went to work.  Hobby Lobby had wall stencils and furthermore I had a 40% off coupon which brought the $17 cost down to my price range, especially if I hated the look after it was all said and done...  So, I purchased a stencil that I thought looked like me and experimented.


A few notes here:

-everyone always talks about using stencil adhesive or spray adhesive or painter's tape.  I'm telling you to use ALL of it!!  They are not really interchangeable (okay, maybe you could use spray adhesive or stencil adhesive interchangeably.)

-Do not FORGET the blue tape.  Do as I say, not as I photograph or you'll be sorry.  Trust me, having the stencil stick to the roller, come off the wall, fall back on the wall, and then hit the floor causes "dirty word" to spring from your mouth.  (yes, I usually use "dirty word" instead of actual dirty words because of my job.  it helps when I get mad or drop something at work.  that way i don't let a true bomb drop.)

-Another tip is to use a foam roller and roll the roller in one direction only instead of back and forth.  It helps with the bleeding thing.

Anywho, after the learning curves, I ended up with this.


I'm in love!  (although, i am slightly worried about it.  the pattern is only on two of the four walls in the pantry and seems a little overwhelming.  maybe with the addition of shelves, it will calm down the overall look.)

Here is a look at the walls when you walk in.  I still love it despite my fears!!

Monday, July 11, 2011

Sit a Spell

At my last garage sale, my SIL brought over her beloved rocking chair from her aunt.  Because of a combination of the "fabulous" (sorry Aunt Jackie) look of the chair and the fact that my nephew is perfecting his mountain climbing skills, my SIL felt that she had to sell the chair.  I knew she loved it, so I told my bother to put it back inside.  I knew that with a little love and sweat, the chair could be beautiful.  (Unfortunately I couldn't and still can't do a thing about Zach's climbing ability.)  Did I mention the look of the chair was straight out of the 60's? 


Isn't it pretty?  Yeah, not really in the vein of my SIL's house.  (Again, sorry, Jackie.  It does have  great bones though!!)  In case you're missing part of the glory, check this out.


Yup, it featured every great color that WAS in my house before its transformation.  Scary.  Anyway, it plunked itself in my living room and sat there for almost six months before I got around to transforming it.  Hey, I said I'd do it, I didn't ever say it would be fast!  ;)  

I typically am a big fan of the Behr Ultra paint.  So much of a fan in fact, that I know Guy and Suzanne on a first name basis at local Home Depot.  I love the low-ish odor, easy clean-up and so far great wearing paint, but I didn't think it was right for this project.  Okay, so maybe part of it was I didn't think it was right and part of it was the fact that I was desperate to jump on the chalk paint bandwagon.  

In case you have missed all of the blog buzz about Annie Sloan Chalk Paint, I'll give you the short version.  Chalk Paint is an all natural paint with NO, yup, no odor which dries to a super matte finish.  It requires no sanding, striping, priming or other prep work.  If you've ever tried to sand anything, you will understand my immediate interest in chalk paint.  Add to that it's an English product that allows the under thing, whether wood, metal, glass, brick, cinder block, whatever to breathe and I was hooked.  And after a little research, I found the price.  Ouch.  It's not cheap stuff folks.  At almost $40 a quart, this cheapie was a little shell-shocked.  It didn't take me long to convince myself that the paint was worth the original cost, but not shipping.  (I really HATE to pay shipping on anything!  Yes, I'll spend twice as much on gas, but I digress.)

So, after checking the state side suppliers, I found one in little ole Waco, TX.  Imagine!  It's one of 3, yes 3 in the entire state.  I did some sweet talking of my mom and Mimi and they graciously picked up a quarts of Old White and Paris Grey for me.  It is a probably a good thing that I didn't go because I'm sure I would have come home with way more than two colors.  (Scroll down on the link to see the best representation of all the available colors I could find.)

My mom decided she would use the Old White to redo the daybed in her "kids' room."  Because I had no idea how far this paint would go, regardless of what is online, I went with the Paris Grey for the rocker.    In true Sissi fashion, which I could blame on the 3 digit heat, but since I do the same in winter I can't, I plunked the rocker down in the middle of my living room on some leftover plastic dropcloth.  In one evening, I was able to double, yes double coat the entire rocker, complete with flipping it different directions for total coverage and wax the whole piece.  When the paint first dries, it is very, very matte with somewhat obvious brush strokes. 


Since I get brush strokes on every stinking thing I paint, this doesn't surprise me in the least bit.  I'd blame it more on the painter here than the paint.  But, anywho, the paint covered the finish nicely and and worked great.  After the paint was dry, I put a coat of Johnson's wax on it and buffed it to a shine.  I also used 220 grit sandpaper to knock down the brushstrokes and add a little wear and tear to the piece.  My goal was to make it look like it came out of a French farmhouse.


While the chair was only an evening's worth of work, the cushions were a different story.  I went with the same neutral fabric that is elsewhere in my house.  Thankfully I was able to squeeze all the pieces out of scraps left over from Elphaba and slipcovers.  I made easy to clean covers that zip on and off since I know better than to think they'd stay clean for long.  For picture purposes, I grabbed my ruffle pillow and it fit perfectly.  Since it's currently destined for Zach's room, the ruffles aren't a permanent thing, but I'm on the lookout for a train pillow.


In case you need a refresher...
 Not too shabby I'd say!


(All opinions are completely mine and I haven't been paid for them!)

Friday, July 8, 2011

Uh-Oh...

I've discovered something about electricians.  The better they are at their job, the worse they are at keeping a room/house clean.  If you recall my previous post, there was a slight hole left after George finished his work.  He needed to access the electrical box from the inside of the house, so out came a smallish square of drywall.  (what I love is my blogging program doesn't even balk at smallish as a word anymore...)  


Apparently George already had the screws and felt a need to use each and every one of them!!  There are count 'em, 22 screws holding up the slightly larger than 8x10 piece of drywall.  The floor, baseboards and nearby furniture was full of drywall dust and pieces.  Yucky stuff.  After a couple of vacuums and several scrubbings, (why can't that stuff come up the first time??,) room is starting to look more like normal.  There still was the matter of the screws though.

Out came the large bucket of drywall compound, tape and floats.  Within a quick afternoon, the entire hole was covered.  Then, with a quick swipe of orange peel in a can, not kidding here, the entire hole was fixed. 


While it was indeed patched, it wasn't exactly un-noticeable if you know what I'm talking about.  So, I dug out the paint from the walls and did a double coat paint job.  After a short dry time, I re-hung the PLAY and now it's impossible to find the hole.


I must say that I'm pretty happy with the results and thrilled to once again have a "finished" (I use the term loosely) guestroom.

Wednesday, July 6, 2011

When we last spoke...

I showed you the results of my fabulous electrician plus the not so fabulous after effects of the work.  In case you don't recall, I didn't go looking for things to dump massive amounts of money on.  All I wanted to do was put in a couple of lights in my new pantry.  That is exact moment when the bottom fell out and I discovered that my entire electrical box had to be removed and replaced.  Ugh.


Now, fast forward two-three months (can't recall exactly) and with my new electrical box, I'm finally ready to get those lights in. 

With 100+ temps outside, not to mention inside a stuffy attic, we crawled up there EARLY one morning and tapped into the new wiring to run power for my new can lights in my pantry.  

With tons of effort, literally dripping sweat through the holes in the ceiling down to the floor below, we installed the two lights.  I also learned that drywall nowadays is slightly thicker than drywall from 1961.  In fact, just thick enough to elicit dirty words from us while trying to get the sweet little clips to adhere.  After a slight argument with involving a pair of vice grips, the clips snapped into place and my ceiling looked liked this.


Anyone notice anything wrong with these pics?  

Anyone?  

Anyone?  

Yes, you in the back.

That's right.  These are brand new lights, with power hooked up and new bulbs and they're not on.  Whoops!  

Great... 

Fabulous... 

Bleep... 

By the time we figured this out, it was way too late in the day to continue working on the triple digit attic.  We had no idea where the fault lay, but it drove us nuts.  See, with the new electric layout, the walls were becoming choked with switches and outlets and driving me more than a little batty trying to figure out what went where.  So, in blatantly copying my little brother, I went with an automatic switch in the door jam to flip the light as soon as the door was opened.


So, now we were left with trying to figure out if it was the switch, the new wire (doubtful), my wiring abilities (my personal favorite) or the lights them self. 

After a quick trip up into the attic the next morning, (of which I had no involvement with, which is most likely why it worked) my lights came on.  It turns out that it was the quick connect adapter thingy (technical term) where you connect black to black, white to white and ground to ground.  (see?  I was listening!)  Anywho, the lights are now functional each and every time the door is opened.  


Aaaaaaaaaaaaaaaaaaaaaaaaaa!!!!

Monday, July 4, 2011

Happy Fourth of July!


Have a safe and Happy 4th!

Friday, July 1, 2011

Outlining Letters

I've had a couple emails asking how to make your font in outline form, so I thought I'd throw in a quick tutorial in case you feel inclined to try your hand at "P.L.A.Y."  All of these directions and screen shots are for a Mac and Word.  I'm assuming that it's similar to Windows and other word processing programs. 

Choose whatever word or letter that you like and put it into capital or lower case letters.  Whatever you want your final product to be.  Highlight your word or letter or all the formatting you do won't effect your letters.


Once you have your words highlighted go up under the format menu and select Font.  This should open up another menu.


In the box that launches, check the box next to outline and then choose a larger size to really "see" the font in outline form.


This isn't the size that you're going to use if you want a letter per page, but it will let you pick the font that you like best in outline form.  Once you choose your font, select okay.


In the toolbar, hightlight the actual size that the letters are and change it to whatever you like.  I start with something simple such as 200 and go up and down from there until it gets close to what size I want.  Keep in mind that just because you use a size 200 in one font doesn't mean it won't take a 300 to fill the same size space in another font.  See the example.


Once you get the size you want, center the letters to make alignment easier and then print.  Enjoy!