CLICK HERE FOR FREE BLOGGER TEMPLATES, LINK BUTTONS AND MORE! »

Saturday, July 24, 2010

Mirror, mirror on the wall...

When I sat on my new lovely couch, I discovered that I had a large hole on one wall. Now, not that kind of hole. My drywall was completely intact and painted. What was missing was any sort of decor. Apparently the hole so disturbed me that I didn't even take a single picture of it! Anyway, the hole was on the wall opposite the windows in the room, perfect for a mirror. Now, to find the perfect mirror. Thankfully I was able to spot one the exact right size at Burlington Coat Factory in San Antonio. The great part was the price, $25! Wahoo!


The only issue with the mirror was the finish. The odd coloring wasn't the exact look I was going for. I wanted something more broken in and welcoming.


Thankfully I had a ton of leftover paint from the various walls/furniture in my house. After a coat of Behr's Heavy Cream, I had this result.


While I was happier with this result, it still wasn't where I wanted it to be, so, back to the drawing board I went. After pouring a bit of water, okay a lot of water, into the empty can of Behr's Roasted Nuts. (It's the name of the paint, I promise!!) I did a fabulously sloppy job of rubbing the watered down paint all over the frame. After a quick rubdown I had a warm detailed look that perfectly matched my living room.


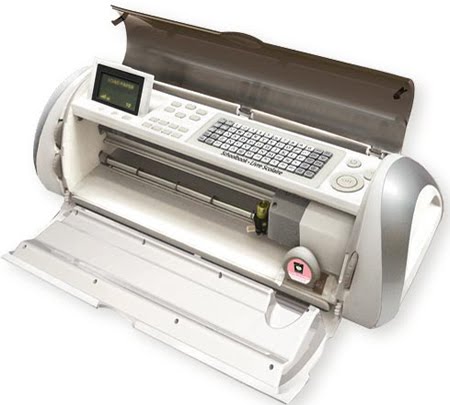
While the mirror looked great, it lacked the welcoming look I was craving. Off to the Cricut I headed. Out of white vinyl I cut a stencil for Welcome and the swirly-ma-bob (technical term!) using the Plantain Schoolbook cart. (I used the white vinyl because it was the color I had the most of and I didn't have the stencil stuff.)


After painstakingly applying it to the mirror and making certain it was centered, I protected the rest of the glass with magazine pages and sprayed on 3 light coats of glass frost. After letting the paint set up/cure I carefully, oh so carefully, peeled off the vinyl and tape and carefully cleaned the glass. Now, I didn't clean it as thoroughly as I wanted, but there is time for that later. What I ended up with was a great piece in my living room. Now it sends the right message to all of my guests. Feel free to stop by and check it out for yourself.

Thursday, July 22, 2010

What is a Cricut?

I have heard several comments about what is a Cricut? What are Cricut carts? Huh???? Okay, put your fears to rest and enjoy my following: (Keep in mind that I receive NO compensation from the Cricut company or any of the companies I mention. I've just used their products or ordered from them and have been pleased with the results.

Image courtesy of Hallmark Scrapbook


A Cricut is a product built by ProvoCraft to ease the frustrations of die cutting anything! You load a small cartridge (referred to often in blogdom as "carts") and a vinyl keyboard overlay into/onto the machine and type into the machine exactly what you want to cut and what size, from 1/2"-24" and press cut. Badda-Bing, Badda-Boom, you have a perfect image. Layer these images using the different buttons, similar to using the shift key to make capital letters. You can cut anything from perfectly shadowed letters in almost 30+ fonts to scary witches to a precious animal, to a rockin' guitar to a complete set of paper dolls, including accessories. They are great inventions and coming from an avid scrapbooker and classroom decorator, invaluable to own!

Wednesday, July 21, 2010

I haven't forgotten...

Life has once again taken a trip, but I will get back to the blog world. In the meanwhile, please take gander at this mirror that is now hanging in my living room. Remember, I can't leave well enough alone and it no longer looks like this. The question is, What Does It Look Like Now????


Monday, July 19, 2010

Cleaning up the light

My latest efforts/energies have been concentrated on my craft room/office. I love to craft and have a severe addiction to purchasing craft items. (Don't worry, I've curbed my addiction until I use up some of my stash.) The main problem becomes when I try to organize these items. The storage I had was good, don't get me wrong. It just wasn't organized right. The switch of a bookcase, along with some kitchen containers gave me a TON more working surface and easy access to items. The big issue I'm having now is trouble storing my Cricut carts. I've cruised blogdom, but still can't find the exact storage idea that I love. I'm sure it's out there, but...

Anyway, here are some before and after pics of my crafting area. It's not the most interesting/creative work I've done, but I'm thrilled with it!!

Office Before


Office After

If you look closely, you'll notice that I have a lamp to provide extra task lighting. This lamp didn't always look this way. It was pretty boring and didn't really match my tastes. (It was a freebie borrowed/stolen from my brother's room. Hey, he moved out and left it behind!!!) Anyway, here it is in it's before state. Pretty boring eh?


After a spray with my favorite Krylon color Celery and a bit of cricut-ing, my lamp fits in much, much better!


I couldn't find an exact color paper I wanted for my flowers, so I spray painted one of the pages celery and painted the other sheet with the wall color. After hitting them with Glimmer Mist and adding some ribbon accents, I had the perfect flower for my lamp.

Saturday, July 17, 2010

Jumped on the Bandwagon

Yup, I did it. I've officially jumped on the latest bandwagon crazy of blogdom. Which craze is that you say? Ahh, the cheese dome turned cloche one!

Check out the House of Hepworth's Version

These things are all over the internet and easy to customize to match your decor. Mix an old cheese dome with a pretty candlestick, add some spray paint and glue and Voila! You have a perfect display unit for whatever room you want!

And the total price for your custom display unit? CHEAP!! My cheese dome was $2.99 and the candlestick was a whopping $.99, both found at Goodwill. I had the spray paint left over from my lamps, so that was incidental. After using E-6000 to attach the candlestick, I primed the unit with spray primer and then add my new favorite color spray paint. (celery by Krylon) After letting it dry thoroughly, I replaced the glass top and then there it sat on my coffee table. Don't get me wrong, I love it, but where in the world was I going to put it? Hmmmm... After moving it around several places, I found the perfect spot on my buffet/dresser that sits in my living room. Here it is decorated for Christmas. Not too shabby for under $5!

Friday, July 16, 2010

A Pillow for Your Head

As a Christmas/birthday present last year, I received a full sized sofa, chair and a half and ottoman from a close friend. While the couches are SUPER comfortable, they had been well broken in by my friend's family and friends and pets. The structure of the furniture is great, but the fabric is well worn and starting to fray in spots. This means I'm on a hunt for new pillows and fabric for making slipcovers.

So off I headed to Goodwill to see what I could find. Sure enough they had 3 feather and down pillows for $1.99 each. That's $6 for 3 nice pillows. Don't worry, I did do a sniff test to make sure that they hadn't been in a smoking home! Once I removed the cases from the pillows, I had perfect pillow forms for a heck of a lot cheaper than had I bought the new. Another bonus? I'm following one of the 3 R's. Reduce, Reuse, Recycle! I picked up another feather form for $3 at a thrift store and grabbed an odd size one at Burlington Coat Factory for $5. Now, what to cover these pillows with?

As is my nature, I turned to the internet and blogs for my inspirations. One of the first places I landed in blogdom was
Just Another Hang-Up. Upon seeing her precious gathered pillow tutorial, I knew that I needed one just like it.
Suzanne's Version from Just Another Hang Up


my copycat version, sans flowers
The sweet gathered pillow wasn't the only one that I found and fell in love with. Over at Presser Foot, I discovered a felt pillow COVERED with circles. Sounding odd? Check out Kelli's version, based on a Pier 1 Imports original.

Kelli's Version
While I wasn't overwhelmed with her version in that color, I fell in love with the original from Pier One. During a trip to a Colorado Springs fabric store, I found the perfect color felt discontinued thus marked down, plus an additional 20% off. Wahoo!! The first part of the tutorial instructs you to cut 1 1/2 yards of felt into approximately 3 inch circles. Remember my shopping pic? That's what all of those circles were for. Not all of the circles are pictured! After cutting hundreds of circles, and sewing back and forth for a couple of hours, I ended up with this version for my couch. I love the modern lines and the pop of color. If you look closely in other pics, you'll notice that it's the same color as the lamps.
I have to say, I'm thrilled with how they look!


Disclaimer: Each pillow has a zipper in the back to allow me to wash the slips or change them as I want to, but I did not install them. Zippers and I do not get along. Inevitably I end up trying to sew them to my finger, or put them in wonky. Ugh, ugh, ugh. All the zippers, both of these, past and hopefully future were installed by my mom. There I said it, admitted the whole blogging world, I'm a grown-up that still needs her mother! ;)

Personality... In the Form of Wall Art?

While cruising one of my favorite inspiration sites, Ballard Designs, I discovered this picture.

I love the look of the different patterns and soft colors, but if you click on the picture, you'll see the price. $100! Ouch! (And that's the SALE price!?!?) Some people would give up and resign themselves to blank walls. Personally, I take this a challenge. How can I accomplish this for the least amount of money as possible?

I found the following frames and then my FABULOUS fabric at Hancock's for 40% off the price of $15 a yard. Now, for some of you that might seem a huge price per yard, but it's a huge deal in my book!! (Considering it's a silk-esk icy blue with chocolate brown velvet accents.)


Notice that the frames are an odd gold/platinum color, which really doesn't match the whole color scheme I've got going. Sooooooo, out comes the ORB (oil rubbed bronze) spray paint. After sanding, priming and painting the frames, I cut out rectangles of the fabric, backed it with polar fleece, and inserted it in the frame. 4 quick nails in the wall and I have wall art!!


The best part of the whole project? Each "art piece" only cost me $3.75. Not too shabby in my book, especially considering that at this moment, I'm perfectly content with them!! Let me know what you think!

Thursday, July 15, 2010

Shopping Trip

One of the things I noted in my list of learning is that the cost of the drywall, nails, boards and paint is only half the cost of making a house. To make a house a home, there has to be something in it that shows your personality, in a good way! Unfortunately, my personality isn't cheap. (Not sure what this says about me, but so be it.)

While my personality is expensive, my wallet is cheeeeeeeeap! So, what's a girl to do? I'll tell you what, you learn real quick that your only saving grace is going to be your local or not so local Goodwill, Ross, Salvation Army, and friends' and families' garage sales! Below is my haul from my recent visit to Colorado. Yup, I said haul. We did, hauled it all the way back to Texas. Hey, a girl has to grab a deal when she sees it! EVERYTHING in the picture was purchased for a steal using coupons, clearance sales and braving shopping on a holiday weekend. Stay tuned to see how I transform this hodge-podge of stuff into personality for my house.


Plugging the Circut...

Several people have mentioned that they are interested in getting a Cricut. I strongly suggest it, but there are a few things tips I'd follow.

First of all, go with the Cricut Expression. It's the larger of the two machines and it will cut up to 12"x24'. Much better than the 6"x12" the "Baby Bug" will cut.

Second, don't purchase your machine at a local hobby/craft store. With just a little searching & shipping patience, you can have your machine and be richer too! My FAVORITE place to get all things Cricut is Hallmark Scrapbook. (No, I'm not getting paid or compensated by them in anyway, but I could be bought if anyone knows someone with them!!) Check them out at www.hallmarkscrapbook.com

Third, get a stack of cardstock and play with your machine. Learning your machine is going to be the easiest if you just sit down and try different things out. DO NOT "learn" to use your machine on your expensive paper that you only bought one sheet of because it was perfect for your _______ project. (Trust me here, you say words that make your mom give you dirty looks!!)

Fourth, use the internet to your advantage. There are TONS of examples, tutorials and videos on how to do just about anything with you machine. (Yes, there are even people out there who will show you how to take it apart! Watch out for Dave, Jess!!) You can spend your money on books if you want, but surfing the internet will give you the same result for less money. Now, while I'm a fan of not buying books, I am will say attending a class in your area is a good idea. Sometimes it's just nice see someone else work your machine. There are several of these around. Look into your community centers, local scrapbooking stores, hobby stores and even Archiver's. Again, no money exchanging hands, at least they're not giving me any. (I give them plenty each time I visit!) www.Archiversonline.com will give you locations and class schedules. Classes vary from free (wahoo) to $25 and for the most part provide all the supplies.

I hope these tips help. I LOVE my Cricut and especially love how it makes me look talented. All you do is type, press cut and then glue. This I can handle!!!

Sunday, July 11, 2010

Before & After: The Miracle of Change

I have to say that my biggest problem in life is that I look at things, items usually, not necessarily people, and see their potential. (I recognize that I need to work on this trait in people as well, but that's not the point of this digression, so...) It is this looking at the "rosy" side of things that has turned my life upside down, which on most days I'd say is a good thing.

Almost one year ago, I was shopping with a friend and spotted a bottle of Fendi perfume. Upon seeing the bottle, I called another friend who I knew was looking for that scent. She told me that she was talking to her realtor (she was trying to sell a rent house) and her realtor knew of a house that was about to come on the market with an asking price near my top price in a safe neighborhood. It did need a little work, but with my family that would be no problem! (Her words, not mine!) (Yes, she did end up getting the perfume too!) After calling the realtor the next morning to see the house, I was placing an offer by that evening. Thus began the turbulent ride that has become my every waking moment.
A very sweetly appearing house from the outside, the inside was not so great. It was full of termite damage, leaking pipes, trash, rotting carpet, urine, fecal matter, and the most foul stench. Did I see any of that???

Oh No! Instead I saw a fabulous house completely finished in my favorite style with plush furniture, exquisite trim, cushy rugs, and cool air conditioning. Let me tell you, whatever glasses I was wearing, I want them back, because this is what I walked into! The lower right corner under the quilt is hiding a shoulder mount of the largest deer I've ever seen. The sheet in the lower left if covering a motorized wheelchair, proof that this house held a bit of everything!

Knowing what I now know, I'm guessing that the house was vacant for a while before the nephew returned from the Navy to live there. Yes, there was someone living there. All I can think is that he'd been on a submarine for his entire tour of duty and this was better than a berth 2,000 feet down!! I also learned from neighbors that the former occupants were crazy. I'm no talking a little quirky here, I'm talking had official papers and locks on the doors to lock the woman INSIDE her room!! All I can say is that the house definitely had personality upon my arrival...

Over the next 5 months, almost every free waking moment was spend pulling up carpet, ripping down paneling, scrubbing walls, running new PEX water lines, grounding old but safe wires, painting and and EVERY surface and sweating buckets. Like Tim Allen, I too landed in the ER with a horrible reaction to a tetanus shot after I stepped on a rusty nail. We had one broken nose after a terrifying leap from the top of a ladder. (By the way, when they say don't stand on that step, they really mean DON'T STAND ON THAT STEP!)

In December I made the big move to live there full time. I did it quietly with no pomp. I'd like to claim that's it my personality, but we all know better. I was terrified that I wouldn't make it the entire night and have
to go back home. I've spent the night by myself before, but have never lived by myself. (With 2 sisters, 5 brothers, 3 sister-in-laws, 2 brother-in-laws, 2 nephews, 3 nieces and various dogs, can you blame me??) The night went just fine, probably due to the fact that I was completely exhausted!

Since then, I've had many good nights in my house and have actually come to think of it as "home." It has a been a ton of work,
some good and some bad, but most all of it stinky! (Really, you should buy stock in Dove deodorant. I think I'm single-handedly keeping them in business. To help you if you ever go insane and want to do this to your own house, here's what I've learned...

  • how to scrub a ceiling to remove nicotine
  • be smart and just give up on scrubbing the ceiling and pay someone to replace the ceiling and cover up the termite damage.
  • which "green" cleaners really clean and which don't! (Go with simple green.)
  • how much work you can eek out of family members and friends just by mentioning them in a blog!
  • how to lay insulation properly.
  • what R-value is. (see #4)
  • how important good neighbors are.
  • that I'd never lay trim without an air compressor. (Hand-nailing, not thank you!!)
  • picking out a gorgeous trim means a TON of coping work.
  • that gorgeous trim makes the room!
  • Yes, it is possible to be so tired that you can't move!
  • People in the 60's had an odd attraction to concrete.
  • The huge difference double pane windows make.
  • If choosing between 2 colors, go darker, it's just paint!
  • Hot glue is really, really hot! It will raise a blister in no time.
  • Beige is boring!
  • There is a large difference in tepee brown and beige, don't be confused.
  • Crown moulding elicits very dirty words from a highly articulate man!
  • It is seriously possible to get addicted to spray paint and not in a bad 12-step way! Spray paint can work miracles! If only it were sold for human figures...
  • Never underestimate the power of finishing a project
  • Fixing the house is only half the cost. It requires decorating and personalizing to make it a home and that stuff's expensive!
  • One's diet goes to heck when you live by yourself. Popcorn for supper? Sure! $1 Sonic Ice Cream Cone for breakfast? Why Not?
  • The importance of having a TV in the room where you will be doing the bulk of your refinishing.
  • They lie on TV!! There isn't a darn project that you can finish in 30 minutes, especially a whole room, let along an entire house!
  • Working on a house is great, but sometimes it's more important to spend time with people that matter to you and sometimes, it's okay to just take a day off too!

Monday, July 5, 2010

Cricut Addiction

Okay, along with my need to spray paint everything, I also have a Cricut addiction. For those of you who don't know, a Cricut is a fabulous little machine that you insert paper into, press a few buttons and Voila a perfect item is cut out for you. Different cartridges are available for different theme items and can be cut any size from 1/2" to 24". It rocks!


Lately I've been using it to make different thank you notes. Never knew how many of those I was going to end up needing with buying a house! (Not complaining in the least, I LOVE crafting and will take ANY excuse!)


Accented with Stickles & Glimmer Mist (any reason to sparkle!)


Used the Cricut to cut the "Thank You" & Flower shapes. Stacked them and gave them a Glimmer Mist spritz.


Again, cut the flowers and sentiment with the Cricut. Added a bit of eyelash yarn for fun and because I had it laying around!


Cricut cut "thank you" with misc. paper accents. Cards are a great way to use up those millions of scraps from just about anything!


Notice the perfect shadow on the letters! Yup, the machine did that too! I'm telling you, I LOVE IT! (no, i'm not paid to say this in any way!)

Sunday, July 4, 2010

Happy 4th!!

Still here in Colorado, hanging with the family. Last night we had a "photo-shoot" in the backyard. Both Zach and Nevaeh are NOT thrilled with grass and don't like the feel of it on their hands and knees when they crawl. No problem, I'll put them on a blanket in the backyard and shoot a couple of cute cousin shots. Their dislike of the grass will keep them somewhat contained and allow me to get a couple of cute shots.

Yeah right, silly Sissi!

Grass?

No problem!

Granted, I was able to snap a couple of cute shots, but it quickly became a race all over the backyard!


Okay, where do we look? (notice we're on the blanket...)

Pretty girl, but wait, where's Zach?!? Dang, one down.
(Don't worry, mothers were on hand to help corral!)

"Hey, wait for me!! I'm comin' too!"
Oops, lost the other. Let the race begin!!


Here comes Handsome Man!

Hope you are having a great 4th of July and it ends on a BANG!!

Saturday, July 3, 2010

Cousins...

This Colorado vacation has been a great chance for Zach and Vaeh to meet each other and actively play. (They have met before, but since they were both 3 months old, there was little to do except cry together!) This visit they have been able to spend evenings playing with each other. It's a huge demonstration of monkey-see, monkey-do which is too cute for the adults. (Aunt Sissi is absolutely enamored and looks forward to late afternoon!) One of their favorite parts of the evening is bath time where they splash and carry-on conversations of great importance!

Friday, July 2, 2010

"New" Coffee Table

While looking for lamps and other hidden treasures, I stumbled across this Broyhill gem in a local resale shop. Yup, you heard me, a heavy solid oak, Broyhill coffee table for $40. Granted more than I would normally pay, but stable enough for any "children" dancing or climbing on top!


You can see from the picture that the original finish was pretty shot, but it didn't matter to me because "honey oak" and I aren't close friends! Someone had tried to repair the damage by using a dark gel stain applied over the dings and scratches, but it didn't really help the cause! After attacking the surface with the palm sander to rough up the finish, I primed the entire surface with Kilz, my primer of choice. That stuff will cover anything!


As a result of my "blurfing" (blog-surfing) I have fallen in love with the look of two tone paint. My favorite look is the lighter color on the table base and the darker top. Now where to get the paint... Best place to look is in my supply room/dining room. Being the cheapskate I am, the bottom color is my ceiling color and the top is the color of my accent walls. (Can you tell I had extra paint??) After getting all of the paint on and finishing the surface I decided it needed
something else. I know, big shock that I wasn't happy... (I rarely like my projects the first, second or third time through.) The problem came with the need for an accent on the table top that was subtle, but would break up all that brown and wouldn't compete with anything on the top of the table.


After checking out all of my Cricut cartridges, I found a simple swirly design that I cut out of transfer tape. Using an almost dry brush, I dabbed on yet another color of wall paint into my "stencil." Repeated four times on the edges of the table, the design gives me just the right look without screaming "LOOK AT ME!" My next step was to bite the bullet and take the palm sander to my table. I figured better for me to break it in now than stress when something happened to the finish later.


Notice the finished coffee table is still lacking a little something. All that work and it still wasn't finished...


After much deliberation at Anthropologie, including 2 trips to the back room for the sweet and very patient clerk, Mom and I settled on these knobs. The original knob had a silver center, but my spray paint addiction reared its head! Notice the centers are now a chocolate brown to go with my other accents. Check out the difference from the original Anthropologie knobs and the tweaked version. Subtle, but in person it makes a difference. Let me know what you think!


Alas, as I write this post, I've discovered that I don't have a picture of the finished table with the knobs. Normally this wouldn't be a problem, but since I'm sitting 987 miles from my living room, I can't just snap a picture. So, as soon as I'm back home, I'll update this post with a pic!